Video2PPT Guide
Turn Video into an Editable PPT: Convert Course and Lecture Recordings into Slides You Can Edit
Upload a local course recording, lecture video, or meeting recording. Video2PPT extracts the slides from the video and turns them into an editable PowerPoint where you can revise text, charts, icons, and layout.
If you want to turn a course recording, lecture video, meeting recording, or training video into an editable PPT, the hard part is not downloading the video. The hard part is finding every useful slide inside the video, removing duplicates, cropping away irrelevant areas, and rebuilding the screenshots into a PowerPoint you can actually modify. Video2PPT automates that workflow: upload a local MP4, WebM, MOV, or AVI file, extract the slide moments into slide cards, then use Editable PowerPoint to restore text, charts, icons, images, and layout elements as editable objects.
This guide is written for people searching for "video to editable PPT," "convert video to editable PPT," "MP4 to editable PPT," or "local video to PowerPoint." You will learn how to upload a local video, extract slide pages, review and crop slide cards, choose Editable PowerPoint, and decide between Basic Mode and Pro Mode.
Quick answer: If your goal is to revise text, translate a deck, prepare teaching materials, edit charts, or turn a lecture into your own PowerPoint, use Editable PowerPoint. Basic Mode is better when you mainly want to keep the original background and recover editable text. Pro Mode is better when you need images, tables, icons, and shapes separated into editable elements. Snapshot export is useful for quick review or archiving, but it is not the main workflow for this guide.
Start converting a local video into an editable PPT
Image 1: Click Choose File to select a local video. The same screen also offers Record Screen and online video conversion.
What does it mean to turn video into an editable PPT?
A normal "video to PPT" tool often places video screenshots into a PowerPoint file. That can give you a slide-by-slide file, but each page is still mostly an image. You cannot edit the text, adjust a chart, or move an icon as a separate object.
Video2PPT's editable PPT workflow has two stages:
- Detect and extract the useful slide moments from the video.
- Use AI to restore those images into editable PowerPoint elements.
That means you do not just get a PPTX file. You can open the result in PowerPoint and edit text, move some images or icons, and clean up tables and layouts. For teachers, students, researchers, and training teams, this is much more useful than a screenshot-only deck.
Which videos work best for editable PPT conversion?
The best source videos are recordings that already show clear slides, screen sharing, handout pages, or whiteboard-style presentation content. Video2PPT is not trying to invent a new deck from scratch. It extracts and reconstructs presentation pages that already appear in the video.
Common use cases include:
- Course recordings to editable PPT: Turn online classes, recorded lessons, or public courses into slides you can revise.
- Lecture videos to PowerPoint: Extract key slides from academic talks, conference sessions, and industry presentations.
- Meeting recordings to editable PPT: Save and organize shared-screen content from Zoom, Teams, Google Meet, or other meeting recordings.
- Training videos to PPT: Reuse internal training, product training, or sales enablement videos as editable materials.
- MP4 to editable PPT: Extract presentation frames from a local MP4 and restore them as PowerPoint slides.
If the video is mostly interviews, camera footage, continuous animation, or scenes without stable slide pages, Video2PPT can still extract key frames, but editable reconstruction will be limited. Those videos are usually better for screenshot notes than for editable PPT recovery.
Local video, online video, or screen recording?
Video2PPT supports three input methods: local video upload, online YouTube link conversion, and real-time screen recording. This guide focuses on local video because it is the most controlled path for converting MP4, WebM, MOV, or AVI files into editable PPT.
Local upload works best when you already have a course recording, lecture video, or meeting recording on your computer. You can check the source quality before uploading and converting it. Online video conversion is better when you only have a public video link and do not want to download the file first. Screen recording is useful when you are watching a course, meeting, or replay but do not have access to the original video file.
If your main goal is to turn a local MP4 into an editable PowerPoint, use local upload first. If your goal is to convert a YouTube lecture into PPT, use the Online Video input on the same page or visit the YouTube to PPT workflow.
Step 1: Upload an MP4, WebM, MOV, or AVI video
Open Video2PPT and click Choose File in the upload area. Select the video you want to convert from your local folder. MP4, WebM, MOV, and AVI are common starting formats. If your browser cannot play a specific file format, convert it to MP4 first and upload the MP4 version.
After you choose the file, Video2PPT opens the conversion workspace and starts analyzing the video. You do not need to know how many slides are in the recording. The system samples the video based on visual changes.
If you want to start directly from an MP4 file, you can also use the MP4 to PPT page.
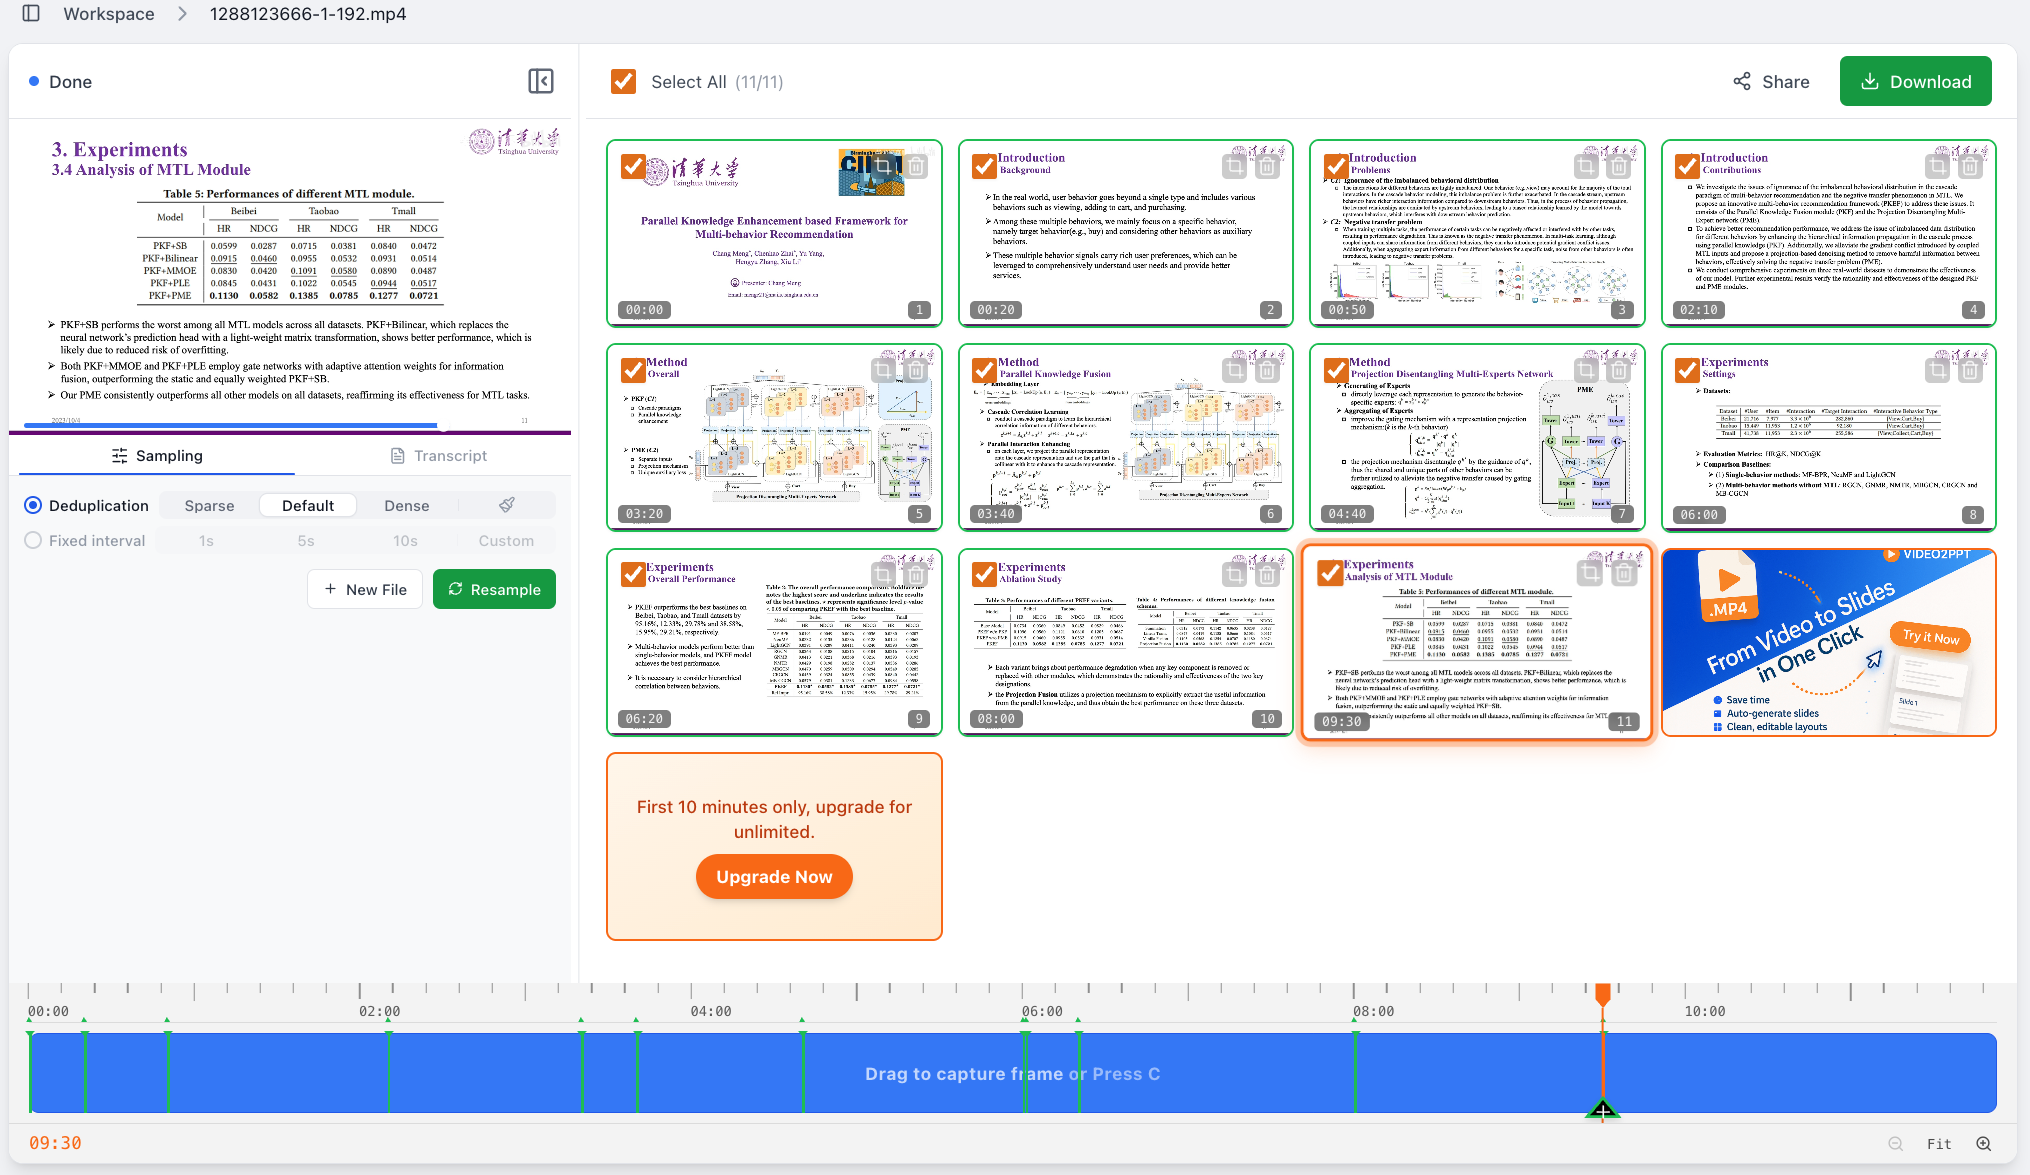
Step 2: Review the extracted slides in the workspace
After upload, you will see a workspace with three main areas:
- The video player on the left, with Sampling and Transcript controls below it.
- The extracted slide cards on the right.
- The timeline at the bottom, where you can move to a specific moment and add missing frames manually.
Image 2: The workspace includes the video player, slide cards, and timeline.
The player can be collapsed. If you have already finished the main sampling step and want more room to review slide cards, collapse the player to give the card grid more space. The bottom timeline is useful for precise recovery: if an important slide was not captured automatically, move to that point in the video and add the frame manually.
This workspace keeps editable PPT conversion from becoming a black box. You can decide which pages should enter the AI recovery step, remove duplicates, crop irrelevant areas, and then start conversion.
Step 3: Use Sampling to extract useful slide pages
Sampling controls how Video2PPT extracts pages from the video. There are two main modes: Deduplication and Fixed interval.
Deduplication: Detect slide changes and remove duplicates
Deduplication is the recommended default. Video2PPT detects visual changes, generates slide frames, and removes similar frames intelligently. This mode is best for courses, meetings, lectures, and screen shares where the main content changes when the presenter moves to a new slide.
Deduplication has three density levels:
- Sparse: Uses stricter duplicate removal and creates fewer cards. Use it when the video has many repeated frames and you only want the core slides.
- Default: A balanced mode for most course recordings and lecture videos.
- Dense: Keeps more candidate frames. Use it when you are worried about missing slides and prefer to delete extras manually.
Dense may produce more similar or repeated cards. That is expected because Dense is designed to keep more possible slide moments. You can delete repeated cards one by one, or use the brush button near Dense to clear the current slide cards and manually add frames from the timeline.
Fixed interval: Capture frames on a schedule
Fixed interval captures frames at a fixed time interval and does not deduplicate slide cards. You can choose common intervals such as 1 second, 5 seconds, or 10 seconds, or set a custom interval.
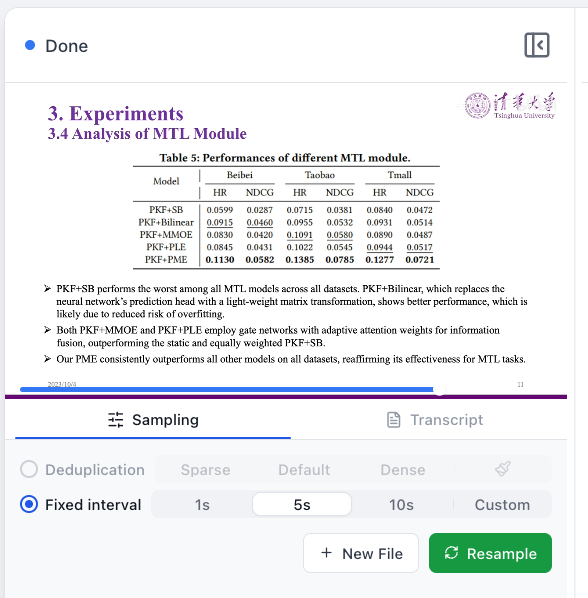
Image 3: Fixed interval is useful when you want time-based capture without automatic deduplication.
This mode is useful when the visual changes are subtle and automatic deduplication may miss content. It can also help with software demos, process tutorials, or experiment recordings where you want to preserve progress over time. The tradeoff is that it creates more cards, which usually means more manual cleanup before editable PPT conversion.
Step 4: Optionally keep the spoken explanation with Transcript
The second tab under Sampling is Transcript. It converts spoken audio in the video into text, including timestamps and speaker separation when available. You can export the transcript as a Word document for notes, meeting records, or lecture summaries.
Transcript is not required for turning video into an editable PPT, but it adds context that may not be written on the slides. For courses and lectures, slide pages plus transcript text are often more useful than the deck alone.
Online Transcript processing may send the video to a third-party speech recognition service, such as Google-related services. Video2PPT does not store your video, but if your material includes private meetings, internal training, or unpublished courses, check your team's data requirements first.
If you use the Lifetime desktop version, transcription can be handled locally. The desktop app includes speech-to-text models so your video can be transcribed on your own computer, which is better for sensitive material.
Step 5: Delete, add, and select slide cards
The slide cards on the right are the basis of the final editable PPT. Each card represents a moment in the video. The timestamp appears in the lower-left corner, and the card number appears in the lower-right corner. By default, the checkbox in the upper-left corner controls whether the card will enter export or AI conversion.
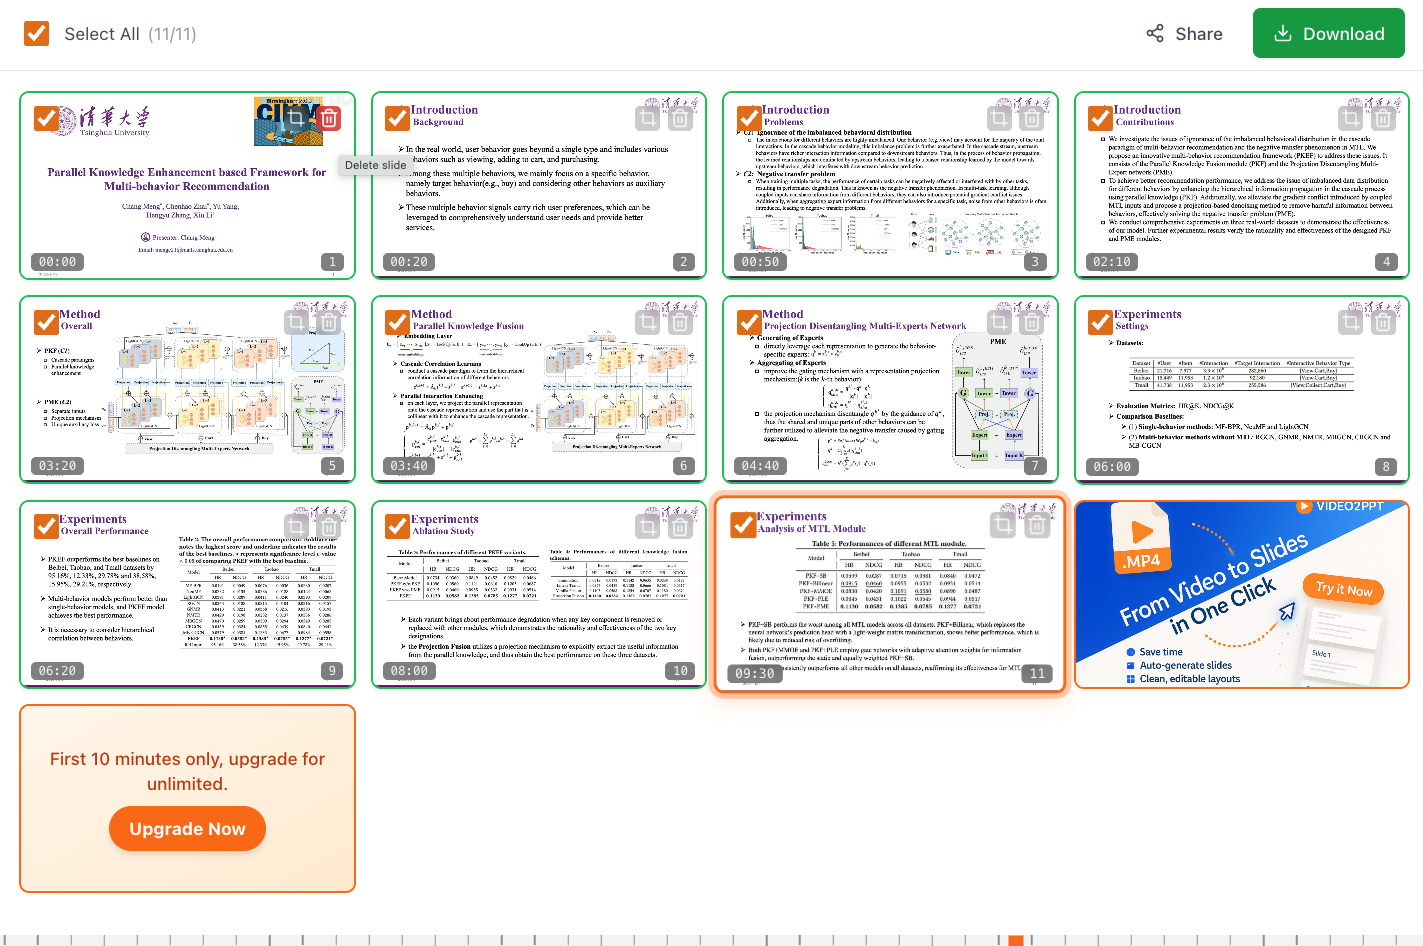
Image 4: The slide card area lets you select, delete, crop, and continue to export or editable conversion.
One rule matters: only use cards you have reviewed for the final conversion. If you keep duplicate pages, ads, blank slides, or transition frames, those pages may also appear in the editable PPT.
Each card includes delete and crop controls. Delete repeated slides, blank pages, and transition frames. Crop pages that include presenter video, meeting sidebars, sponsor banners, player controls, or watermarks outside the real slide area.
For editable PPT output, this cleanup step is important. The cleaner the input cards are, the easier it is to review the recovered text boxes, charts, images, and icons later.
Step 6: Crop the clean slide area
In academic lectures, Zoom meetings, Teams recordings, and corporate training videos, the actual slide often takes up only part of the screen. The rest may include the speaker's camera, meeting controls, chat, branding, or watermarks. Use Crop to keep only the slide area you want to recover as an editable PPT.
Image 5: Crop lets you select a rectangular area and apply it to one card or all cards.
Crop supports rectangular selections. You can crop only the current card or apply the same crop area to every card. If the slide stays in the same position throughout the video, crop the first card and choose Apply to all. This keeps the recovered slides cleaner and more consistent.
If the layout changes during the video, such as switching from a shared slide to a software demo, crop in smaller batches so you do not cut off important content.
Step 7: Choose Editable PowerPoint
After selecting and cropping cards, click Download in the upper-right corner. The panel shows File name, Export range, and Export format. The important choice for this workflow is Editable PowerPoint, followed by Start AI Convert.
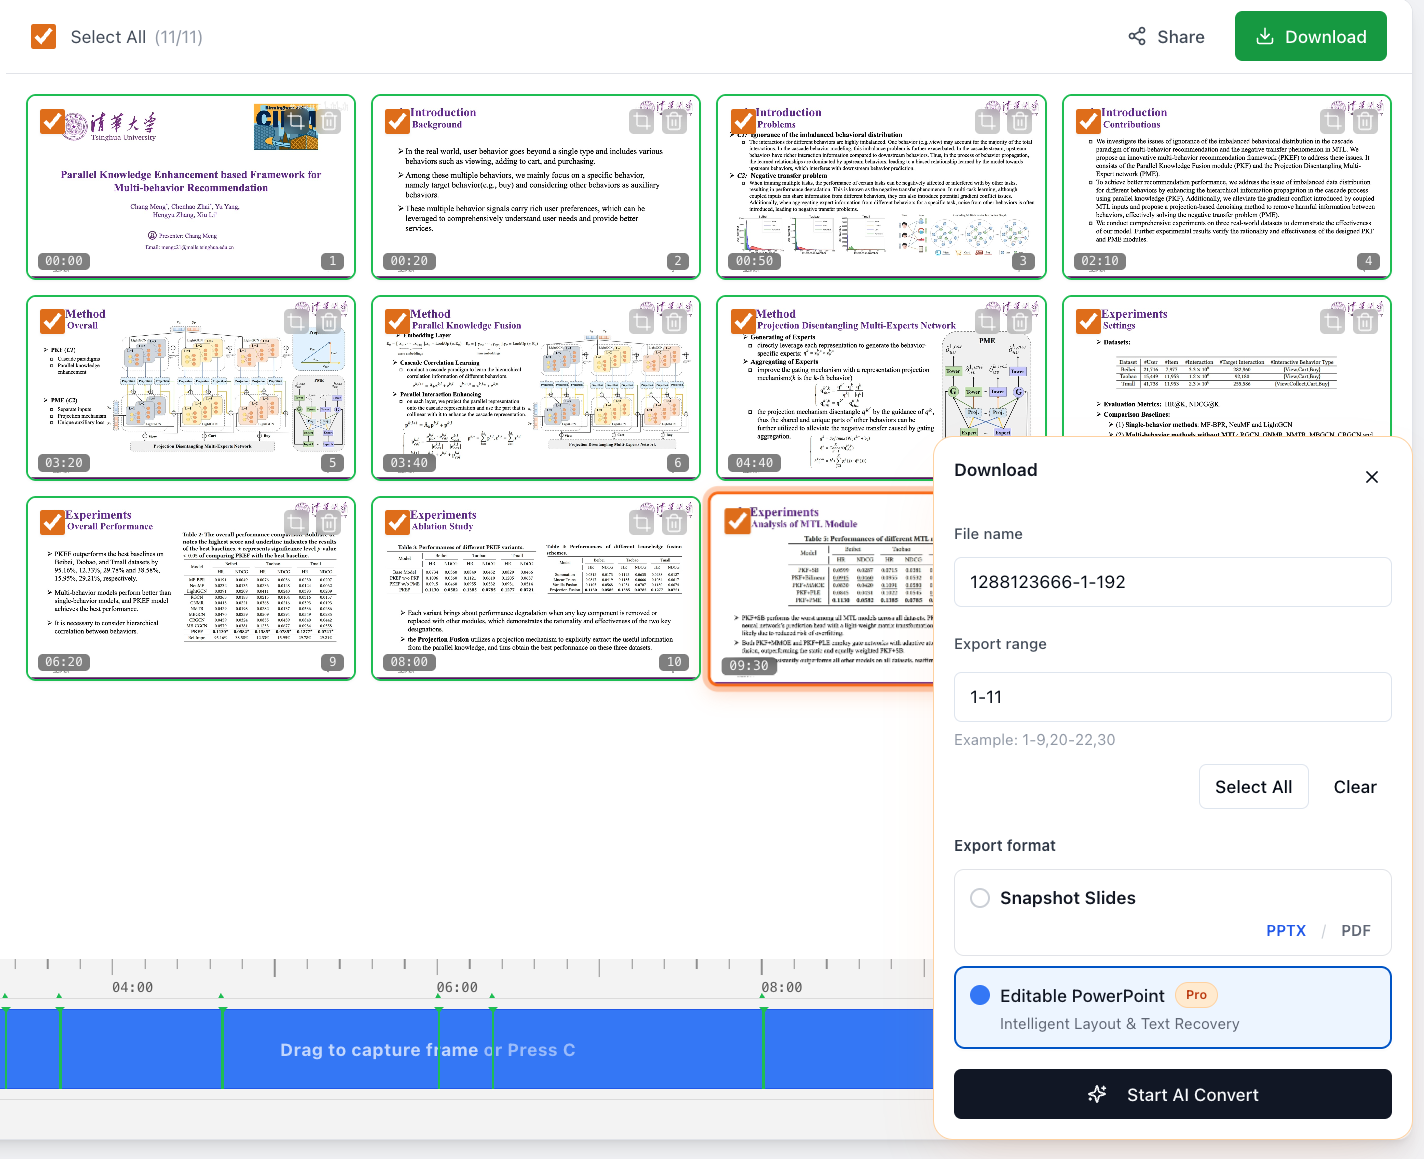
Image 7: Choose Editable PowerPoint to start intelligent layout and text recovery.
Editable PowerPoint does not just place screenshots into a PPT. It attempts to reconstruct the screenshot content as PowerPoint elements. The exported deck can include editable text and some movable or adjustable visual elements.
If you only need a quick study copy, Snapshot Slides can create a screenshot-based PPT. But if your goal is to convert video into an editable PPT, choose Editable PowerPoint.
Step 8: Choose Basic Mode or Pro Mode
After entering the Editable PowerPoint conversion screen, you will see two modes: Basic Mode and Pro Mode.
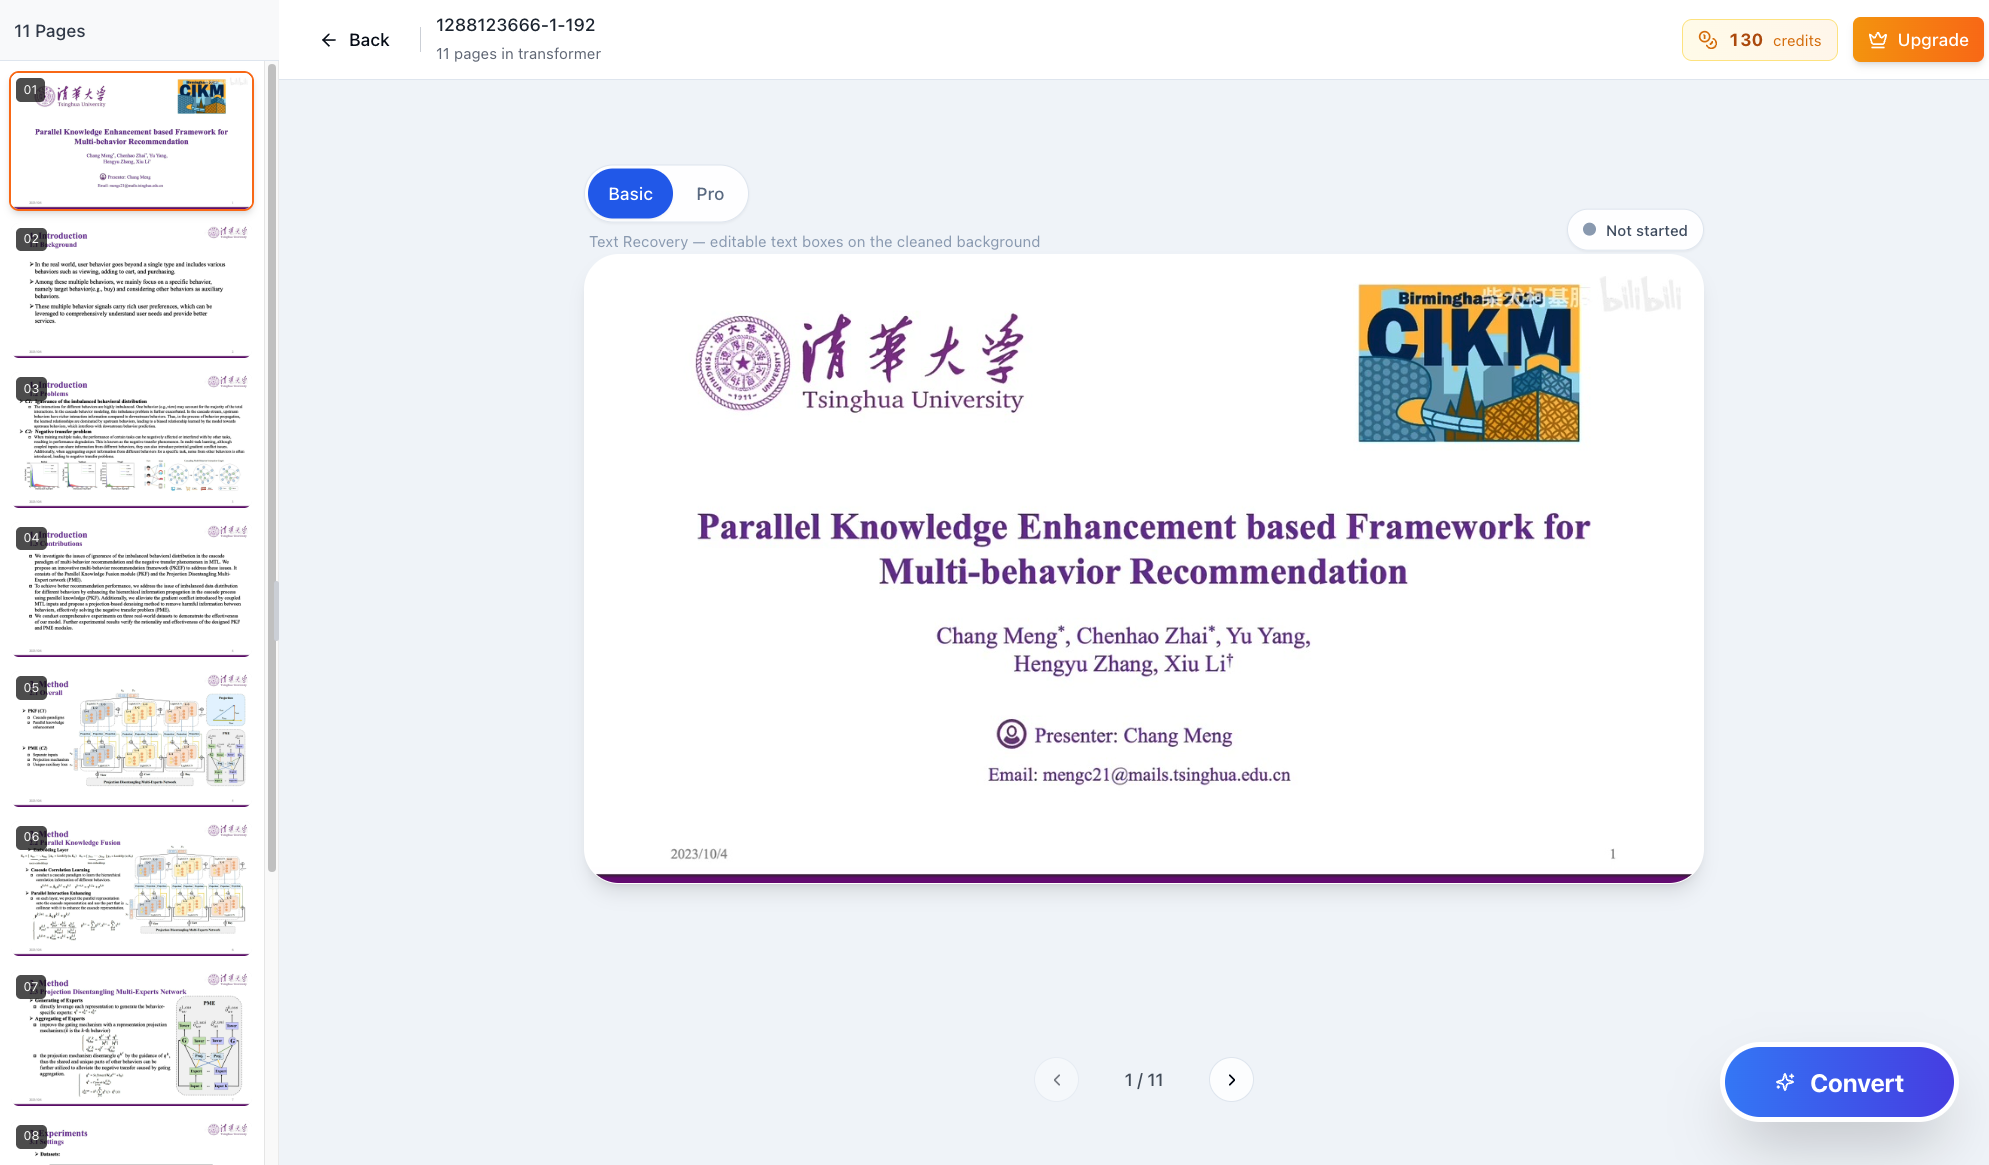
Image 8: Basic Mode focuses on background preservation and text recovery. Pro Mode focuses on separating more elements for editing.
Basic Mode: Best when you mainly need editable text
Basic Mode removes the original text from the screenshot and recreates it as editable text boxes on top of the preserved background. Use it when you mainly need to edit text, translate content, clean up slide titles, or make light revisions.
Basic Mode is usually more stable for backgrounds, logos, decorative lines, and the overall visual layout. For course title slides, university or company templates, and branded presentation pages, Basic Mode often preserves the original look better.
Pro Mode: Best when you need images, tables, and icons separated
Pro Mode tries to split images, tables, icons, background blocks, and text styling into editable elements. Use it when you need deeper revisions, such as replacing images, moving charts, adjusting tables, changing icon colors, or reorganizing the slide layout.
The tradeoff is that Pro Mode may be less precise than Basic Mode. Because it relies on a vision-language model to understand and rebuild the layout, image positions, table boundaries, and icon sizes may need manual adjustment. If you need accurate background preservation and mostly want to edit text, start with Basic Mode. If you need as many elements as possible to become editable, use Pro Mode.
Step 9: Check the recovered editable PPT
After conversion, open the exported PowerPoint file and check three things:
- Are the important pages included, without missing or repeated slides?
- Is the text editable, and are titles, body text, and footnotes separated into reasonable text boxes?
- Do images, tables, icons, and background blocks need manual adjustment?
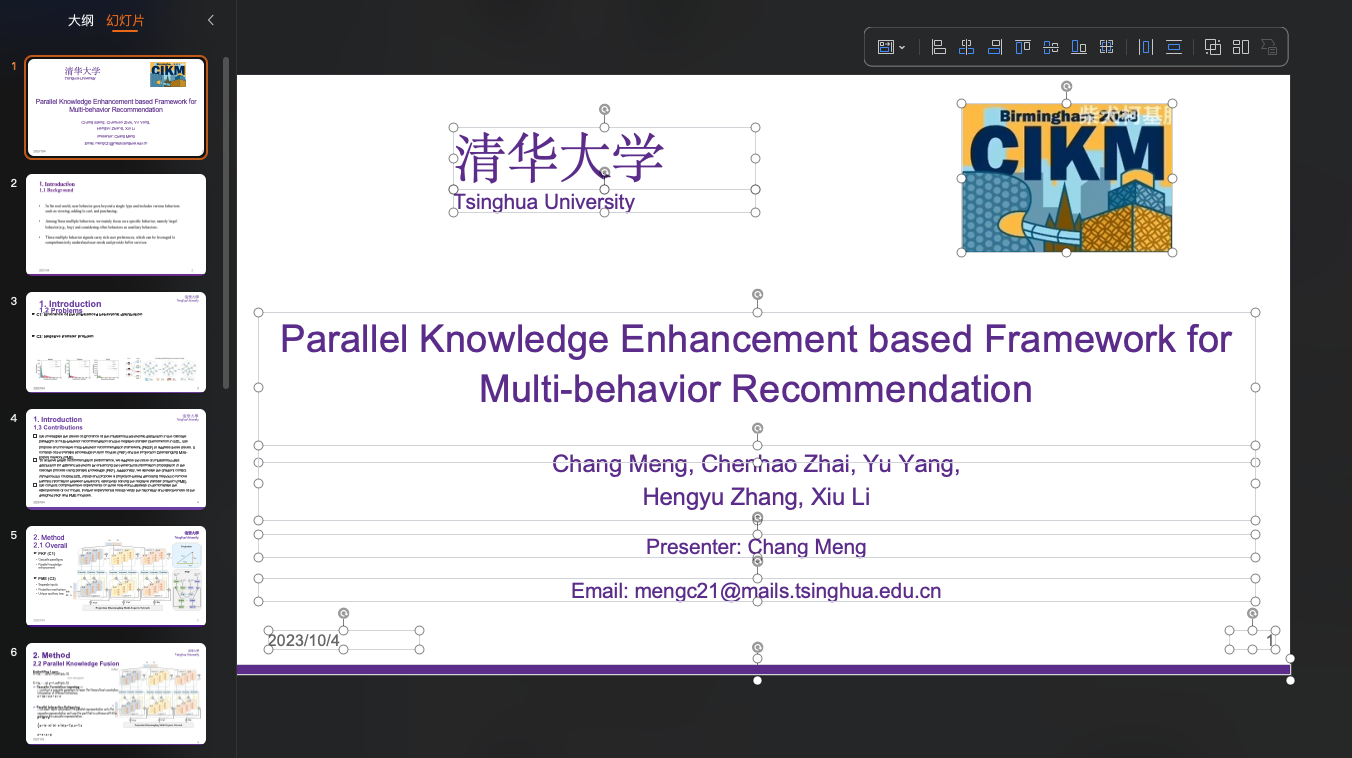
Image 9: In Basic Mode, text is restored as editable text boxes while the background remains relatively stable.

Image 10: On complex pages, charts, text, and decorative elements may be separated into editable objects but may still need manual cleanup.
For academic talks and course recordings, common cleanup tasks include adjusting text box positions, deleting small recognition errors, fixing line breaks, and moving the recovered content into your own slide template. That is still much faster than rebuilding every page manually from screenshots.
Editable PPT or screenshot-based PPT?
This guide focuses on turning video into an editable PPT, but in practice you may choose between two output directions:
| Goal | Recommended option | Why |
|---|---|---|
| Edit text, translate slides, or prepare teaching materials | Editable PowerPoint Basic Mode | Preserves the background while recovering editable text |
| Edit images, tables, icons, and shapes | Editable PowerPoint Pro Mode | Tries to separate more elements into editable objects |
| Quick review or lightweight archiving | Snapshot Slides | Fast, but each page is mostly a screenshot and is not ideal for deep editing |
If you simply need an MP4-to-PPT file for quick review, Snapshot Slides can be enough. If you need "video to editable PPT" or "convert video to editable PowerPoint," go directly to Editable PowerPoint.
Video2PPT also supports PDF, PNG, and JPG as auxiliary exports, but those are not the core workflow in this guide.
FAQ
What is the difference between video to editable PPT and regular video to PPT?
Regular video to PPT usually places screenshots from the video into a PowerPoint file. An editable PPT attempts to reconstruct text, charts, images, icons, and shapes as PowerPoint elements so you can continue editing them.
Why do I see repeated pages when converting an MP4 to editable PPT?
If a slide stays on screen for a long time, or the presenter moves the cursor, opens menus, or adds annotations, Dense mode may keep several similar frames. Switch to Default or Sparse, or delete repeated cards manually.
Why did some slides not get extracted automatically?
If slide changes are subtle, video quality is low, or the page uses many animations, automatic deduplication may miss a slide. Use the timeline to move to the exact moment and add the frame manually, or use Fixed interval to capture more candidates and filter them afterward.
Can editable PPT conversion be 100% accurate?
No. Basic Mode is better for stable background preservation and text recovery, but it mainly restores text. Pro Mode tries to separate more elements, but complex charts, tables, and icons may need manual adjustment. Choose the mode based on how much editing you need.
When should I choose Basic Mode?
Choose Basic Mode if you mainly need to edit text, translate content, adjust titles, or organize teaching material. It usually preserves backgrounds, logos, and overall slide layout more consistently.
When should I choose Pro Mode?
Choose Pro Mode if you need to move images, adjust tables, edit icons, or reorganize the slide structure. It gives you more editable elements, but the output may require more manual cleanup.
Does Transcript store my video?
Online transcription may send the video to a third-party speech recognition service. Video2PPT does not store your video. For sensitive material, use the Lifetime desktop version to transcribe locally on your computer.
Should I upload a local video or use a YouTube link?
If you already have an MP4, WebM, MOV, or AVI file, local upload is the most direct path. If you only have a public video link, use the YouTube link workflow. Both paths eventually lead to slide card review and Editable PowerPoint conversion.
Summary: Turn local video into an editable PowerPoint
Video2PPT's core value is not simply turning video screenshots into a PPT. It first extracts useful slide pages from the video, then converts those pages into an editable PowerPoint. For teachers, students, trainers, presenters, and researchers, this removes a large amount of repetitive work: you no longer need to watch the entire video, pause repeatedly, take screenshots, paste them into a document, and rebuild the slides by hand.
The recommended workflow is simple: use Deduplication in Default or Dense mode, review the slide cards, delete duplicates, add missing frames from the timeline when needed, crop the slide area, and then enter Editable PowerPoint. Choose Basic Mode when you mainly need editable text. Choose Pro Mode when you need to edit images, tables, icons, and shapes.